0

Okay, photos of this manicure are about a month over due. Following my Iron Man Avengers manicure last month, I did a Loki themed manicure based on the dark green and gold of his costume. The movie is still out in some theaters, so if you haven’t seen it, I highly recommend it!

First, here are the colors I chose for this look:

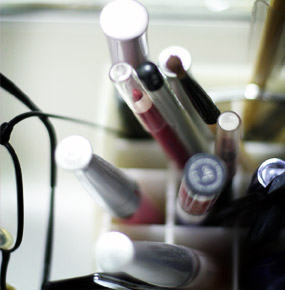
Butter London British Racing Green, China Glaze Jingle Bells, China Glaze Medallion, and Sephora OPI Only Gold For Me.

I had a couple of ideas for a Loki themed manicure, but had some difficulties stamping the gold polishes that I owned onto the dark green. I also wish I had a dark green with a bit of gold shimmer in it, but this still came out quite nice.

The gold triangles in Jingle Bells are painted freehand. I keep meaning to use tape too mask of areas, but I can never get it to work right. A thin layer of Medallion was added to the gold nail and on top of the green, with a tiny bit of Only Gold For Me to add some extra  gold sparkle.

This wore well for a little over a week. Glitter is always tough to remove and the British Racing Green stained a little bit. I like this look a lot, but next time I will probably not apply so much glitter over the green.


0

Sorry for the bit of a break! Took some time off from writing posts, but getting back in the groove now.

Here’s a quick post to show you the manicure I did for Avengers! If you haven’t seen it yet, it’s a fantastically fun movie and I highly recommend seeing it. My design is based a little on Iron Man’s suit – metallic red and gold.

For this look, I used three colors of polish.

China Glaze Thunderbird, Milani Good Morning Sunshine, and Sephora OPI Only Gold For Me.

I absolutely love the way this looks. Thunderbird is a gorgeous blackened red that reminds me of automotive paint. I wish the gold was bit more metallic gold than yellow, though.

I did a bit of chunky gold glitter at the tips with the OPI top coat. It adds a really fun touch!

This wore surprisingly well for over a week and a half with little edge wear. I find that’s typically the case when I put chunky glitters on. I would absolutely wear this look again, maybe without the gold accent nail.

Hm. I wonder if I have a dark green polish that looks similar to the red so that I can do a Loki inspired manicure – possibly with a gold scrolled nail stamp…


0

It’s been a long time since I did a nail stamping design, so I thought I might try this simple look.

The base coat for this was New York Color In a Minute in MOMA and ELF polish in black. I used BndleMonster plate BM-214 for the design.

I’m actually not extremely happy with the quality of the stamping. It was partially the polish I used for stamping and partially that the BundleMonster plates. They are definitely inexpensive if you’re looking too get a bunch of designs, but the quality of the etched designs are a little iffy. I don’t think the feathers are deep enough, so scraping the extra polish often resulted in me scraping it out of the design.

When I was able to get the design to apply, it looks pretty good. I had to redo two nails, though, because the designs transfered so poorly.

I think maybe I should practice stamping some more.


0

Quick look at a Spoiled nail polish! Distant Memory is a dark emerald green polish with a slight shimmer.

This polish dries with a satin finish, so you’ll definitely need a top coat for a glossy finish.

This is a pretty polish on its own, but I wanted to add a little sparkle with Pirate’s Booty, a gold glitter top coat.

I tried to do a glitter gradient with it, but I think the look could have used a chunkier gold glitter on the tips.

Spoiled nail polishes retail for $1.99 and can be found at drugstores like CVS, Rite Aid, and Walgreens.


0

This is a quick post to show you the blue ombre manicure I did a few weeks ago. I dug through my collection to find some blues that were close enough to use – it was strangely difficult  considering how much polish I own.

I ended up with: Color Club Gossip Column, China Glaze Flyin’ High, and China Glaze For Audrey. Because I only had the three colors, I ended up applying For Audrey on both my pink & ringer finger and Gossip Column on my index finger and thumb.

Here’s a closer look at the three colors next to each other:

That’s For Audrey, Flyin’ High, and Gossip Column. I think this came out pretty well and I’d probably wear this combination again!


1

This look is a little bit late, but for Christmas I decided to do this silver & gold glitter gradient manicure. I was inspired by this great metal ombre manicure by Karen from Makeup and Beauty Blog.

For my two metals, I used Color Club Gold Glitter and Color Club Silver Glitter.


I applied two coats of Silver Glitter first, then slowly built up Gold Glitter from the  base of each nail. The final result is a very subtle look – the gold I picked is a bit too silver and in daylight it’s hard to see the gold. In indirect light, the gold is more obvious.

This was a fun manicure and I wanted to try it with silver and blue colors for New Year’s. This didn’t really work as well since I used a blue glitter that had a blue tinted base rather than a clear base.

For this look, I used Finger Paint’s Easel-y Entertained and Scandal’s Diamond Pearl.

I wasn’t a fan of the look, but I got a few compliments. Next time I will definitely try this with a clear based blue glitter.

If you have a few glitter polishes, I definitely suggest trying out a manicure like this. They’re very fun and easy to do!


0

Some Like It Haute is part of China Glaze‘s Eye Candy 3D Glitters Winter collection.

This polish is a clear base with a dense mix of gun metal, black, blue, and holographic glitter! Two coats was enough to cover the nail completely.

Though there was a bit of texture on the surface, it wasn’t lumpy and a coat of top coat got it almost completely smooth. One thing I wish was that the polish was a little less blue and more gunmetal grey. Otherwise, this was a great color. Glitters always wear a bit longer, so I was able to wear this for over a week.

As an accent, I wanted a lighter glitter polish and picked Fairy Dust, which is a fine holographic glitter. It was actually more sheer than I wanted and even four coats wasn’t enough to cover the nail line. I also used a water slide decal on it.

It’s a fun look and next time I’d probably put a silver polish under the Fairy Dust.


0

I’ve been back into glitter polishes lately and started off my latest round of glitter manis with this green/gold combo.

I used China Glaze’s It’s Alive! on my pinky, middle, and index finger and Butter London’s West End Wonderland on the ring finger and thumb.

I love, love, love this combination! The gold glitter adds a great highlight to the dark green. Both of these glitter polishes looked great after two coats, but It’s Alive! is amazing with it’s green jelly base and different sized glitter.

You can see in the close up of Butter London’s West End Wonderland that it’s not just gold glitter, but there are also silver and copper colored glitters. It’s a really pretty combination.

I used two coats of top coat to smooth out the surface, but if your top coat is thicker, one might be fine for you. This  manicure lasted 10 days before I had to take it off. I’ll be using both of these colors again for sure!


0

Early in September I was heading to DragonCon, a yearly science fiction convention held in Atlanta, and I wanted to do a fun look for the weekend. I came across Asami’s Space Nails tutorial and I had to try it out!

The looks requires three or four different polish colors and a textured paper towel to sponge on some of the design. I didn’t have the exact polishes that Asami used, so I picked ones I had that were closest.

From my stash, I found China Glaze’s Techno (large holo glitter), Pitch-Black Glimmer from Nicoole by OPI (black with silver glitter), What’s Your Name by Sinful Colors (black with purple/blue micro glitter), and Sally Hansen HD polish in DVD.

Next, I followed Asami’s video tutorial:

The results are pretty great! I love the bits of glitter that catch the light and the subtle clouds of blue.

There are parts I’m not completely happy with, of course, but overall this was fun and easy to apply. It didn’t take much longer than a regular manicure to apply since the layers were thin and dried quickly.

Can’t wait to apply this design again!


0

A quick but fancy manicure that I put together to wear out for Liz‘s bachelorette party!

I started with a metallic silver base – two coats of Zoya Trixie. Once dry, I applied one quick coat of China Glaze Black Mesh Crackle polish. The ringg fingers I left silver so I could apply a floral water slide decal. Finished it off with two coats of top coat to smooth out the crackle.

This manicure was quick to put together, but looks much more complicated. Very fun to wear!